Streamline Canvas App Formulas With Dataverse Views!
Dataverse Views are a great way to simplify formulas and save time! When working with Dataverse in a Canvas App, often you find yourself using similar Filter formulas many times. If that’s the case, then a Dataverse view is just what you need!
Dataverse Views
Dataverse views display a table’s data in a particular format and structure. They can also contain one or more filters
When a Custom table is created it comes with pre-defined views. The default Dataverse tables used in Dynamics, for example the Account table, often have many more views automatically created when a Dataverse database is installed in an environment
It’s easy to create additional custom views for a table. It is this feature that makes Dataverse views really powerful when used with canvas apps because once created, the view can be used many times throughout the app
Dataverse views have 3 useful attributes that can save time when coding canvas apps
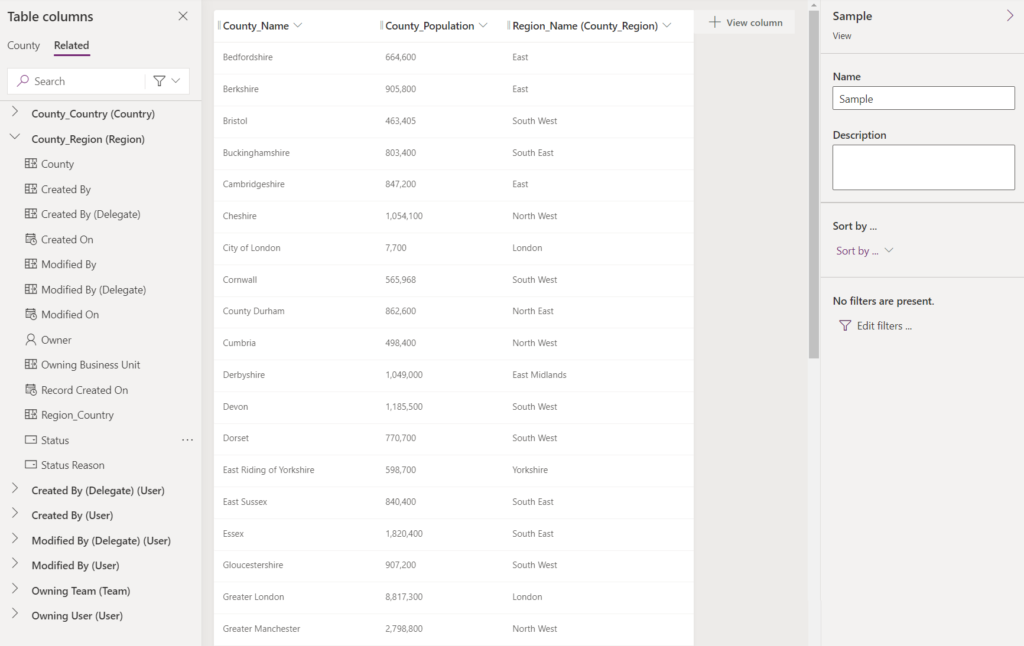
Data Columns
You can define the specific columns of table data that you are interested in, including columns from related tables. This is similar to the Power FX AddColumns and DropColumns functions
Sort Data
Dataverse views can sort data by multiple columns
Filter Rows
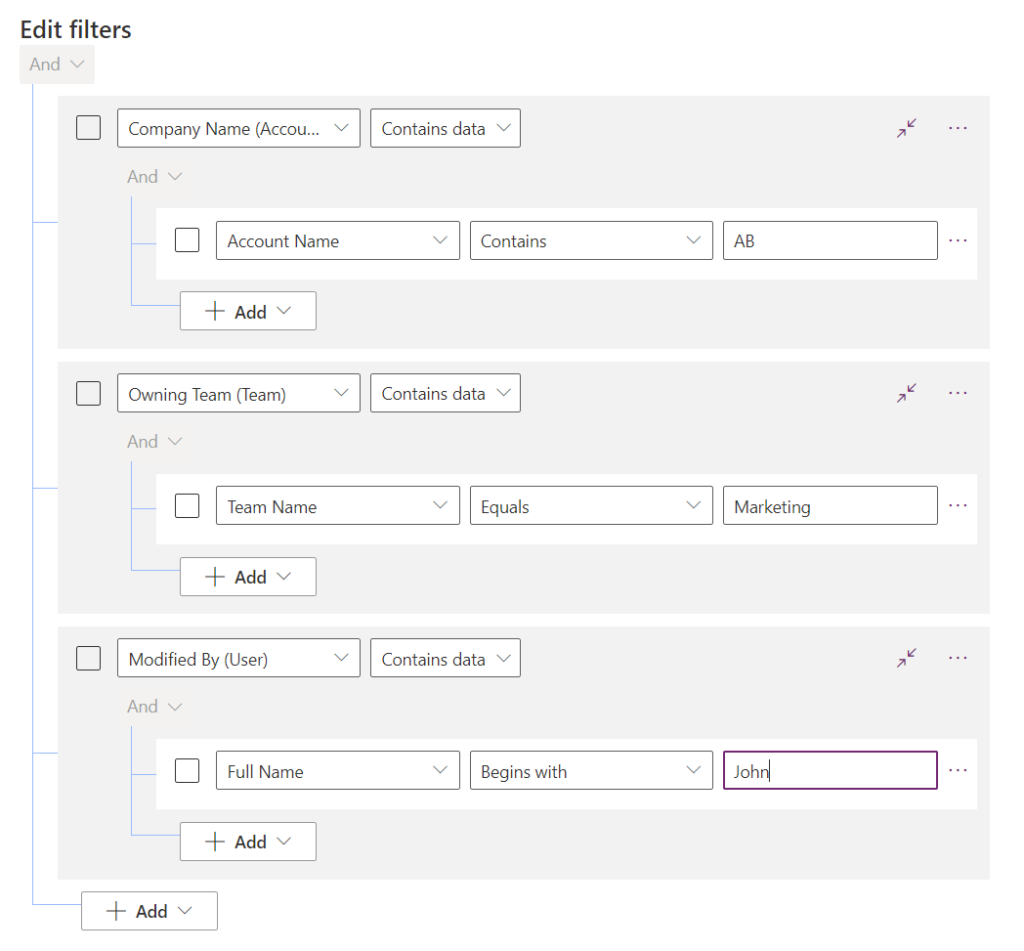
Dataverse views have very sophisticated filter capabilities that pretty much allow you to create any filter on a table’s data that you require. For example, if you have a table that is a child to 3 other tables, you can use the Dataverse views filter capability to isolate the rows you require based on the lookup column data to the parent tables, such as the Account table example below
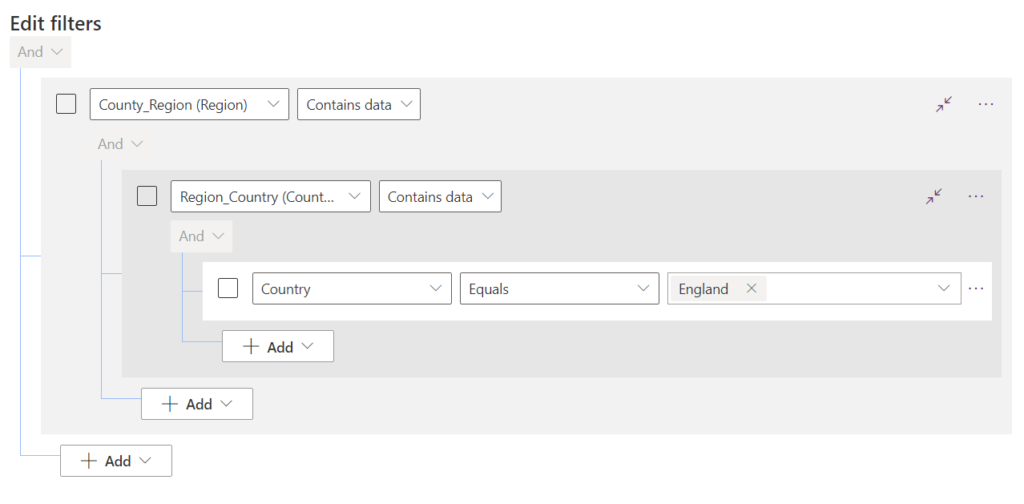
You can also navigate many levels up or down a table structure applying filters at each level. Doing this in a view is much easier that writing a Power FX formula to do the same from within a canvas app
Using Dataverse Views in Canvas Apps
As I mentioned earlier, Dataverse tables come with pre-defined views created out of the box. An example of a pre-defined view that I use all the time is one that filters out inactive records
Let’s take the example of filtering the Accounts table to only display active records in a gallery
To do this in a canvas app we would set the gallery’s Items property to the following:
Rather that write the code to filter out inactive records in the Canvas app, we can reference the ‘Active Accounts’ view in the Canvas app Filter function so it is done automatically!
For example, the formula below, when set to the Items property of a gallery produces the same result
This is great because it allows us to drop the additional code to filter on active records in the Canvas app
Practical Uses Of Dataverse Views
Is it realistic to completely replace every Filter query with a view? The answer is no, not least because there isn’t a way to pass parameters from the app to a view
Also creating a separate view for each possible permutation could mean you end up with a large number of views some of which may be rarely used
I recommend creating a good balance by creating a small number of views that filter the data by the criteria used most frequently. Then refine further to meet specific needs in your Canvas app formula by expanding the Filter function
Below, the result of the previous formula is further filtered within the canvas app code by the ‘Stock Exchange’ column. As you’d expect, the additional filters can also reference external controls such as dropdowns, they don’t have to be hard coded
Filtering and sorting with Dataverse views also have the great advantage that delegation issues are avoided because all the queries are executed on the server. Checkout the example below where a Dataverse view has solved a delegation issue that could not be fixed using Power FX alone: Filter Using Dataverse Views
Once you start using Dataverse views in your Canvas apps, you won’t look back!