Power Apps is a fantastic platform not only to build great Apps quickly, but also to connect to remote services. There are a huge amount of zero-cost web services out there and even many of the premium sites have a free option for developers. Using these free services is a great way to build your skills creating Custom Connectors
Building a Basic Custom Connector
In this post, I’ll cover how to create a Customer Connector to access a simple web service API that doesn’t require any authorisation or data to be passed to it. At the end, I’ll explain how to use the Custom Connector and access the data in a Power App
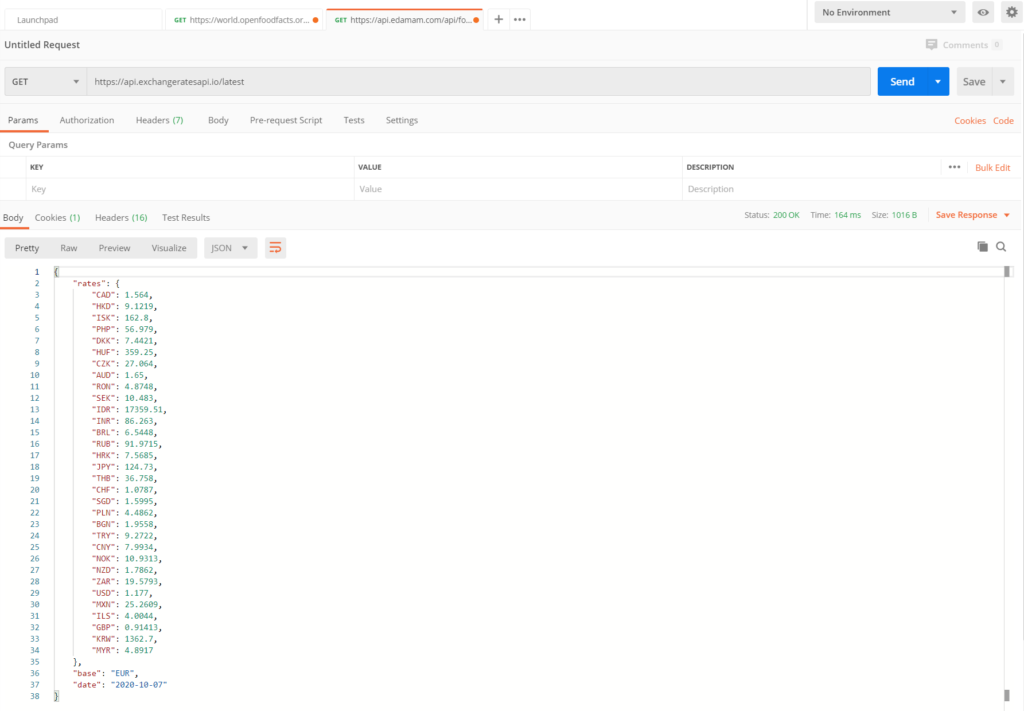
The service I’m going to connect to is exchangeratesapi.io. Type https://api.exchangeratesapi.io/latest into the navigation bar of your browser and you’ll get something similar to the following result that displays the current major international currency exchange rates against the Euro
Whilst it’s not too hard to scan the data that’s been returned here and understand the basic structure, with more complex web services it will be impossible to analyse by just viewing in a web browser
I recommend using a free tool called Postman that is widely used with APIs and Postman will return the parsed data and present it in a structured format. Postman can be run as a client or as a plugin for Chrome. Running the same query in Postman gives the following structured output which is much easier to understand and interpret
You can create Power Apps Custom Connectors directly from a Postman collection, but for now we will build a Custom Connector from blank
Creating the Connector
OK, let’s get started…
To build our Custom Connector, go to make.powerapps.com and select Data / Custom Connectors and then select New custom connector / Create from blank. Give your Connector a name
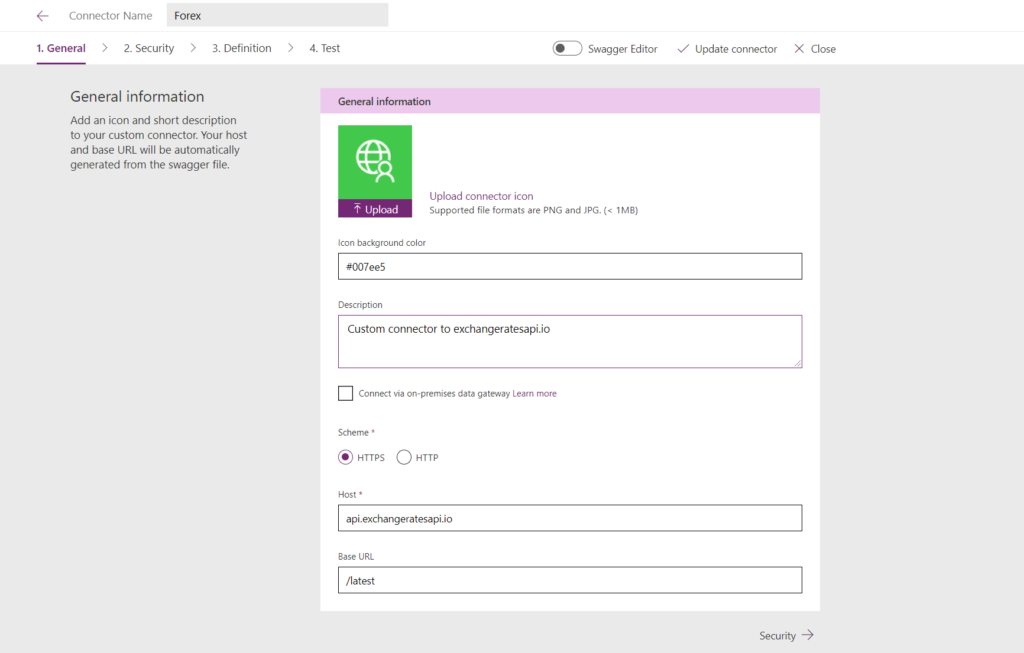
We’ll go through the 4 steps to create a Custom Connector. On the first ‘General’ page, add the icon & colors for your new Connector and add a description so your users will understand its purpose. In this case the api.exchangeratesapi.io is secure so select HTTPS. Complete as below including the ‘Host’ and ‘Base’ URL. The Base URL is the path required within the domain to access the web service and consequently needs to be prefixed by a ‘/’
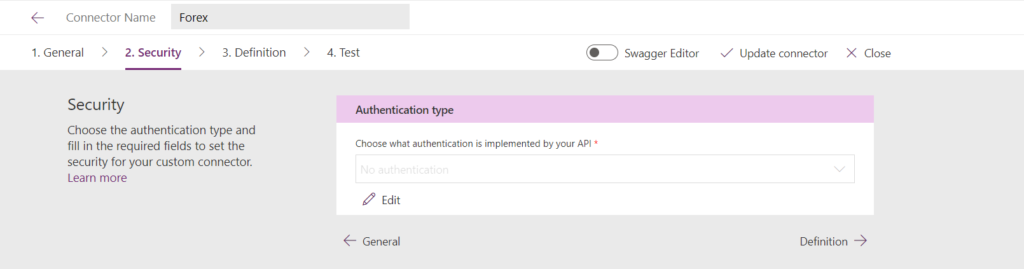
Now we move on to Security
No authentication is required to access this particular site, so on to step 3: Definition
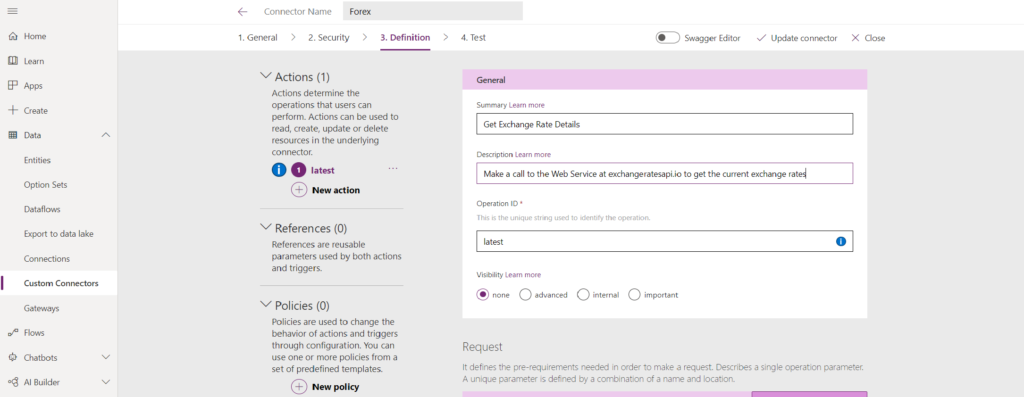
The first thing to do here is to add an Action and give it a summary and description. Add the Base URL entered on the ‘General’ screen in the Operation ID box, but this time without the ‘/’ prefix. Leave the visibility unchanged as ‘none’
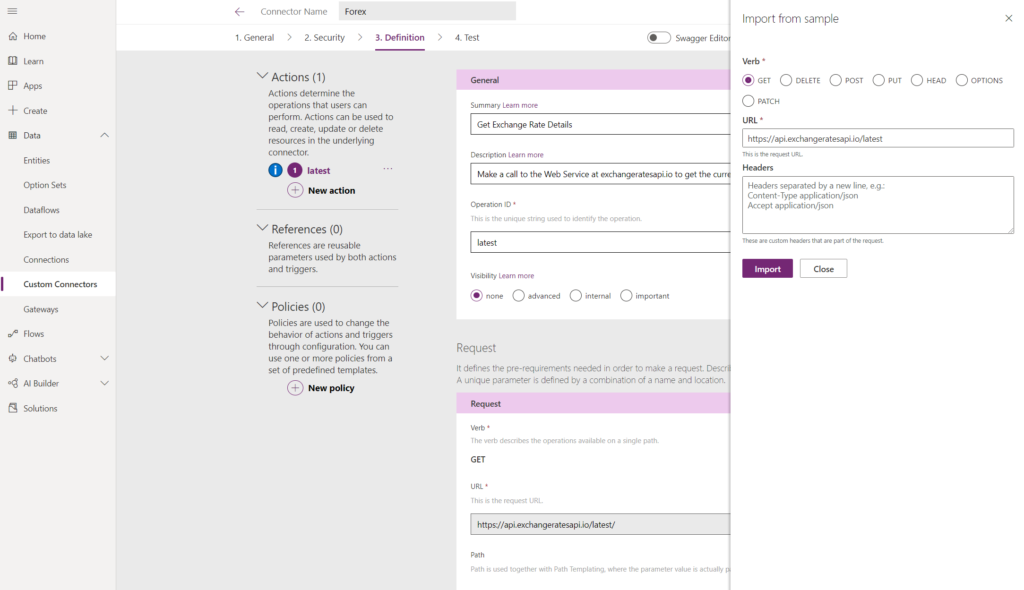
We need to define the request we are making of the web service. Click ‘Import from sample’
Select ‘Get’ as we are simply receive the exchange rate data, rather than interacting making any data changes. Now copy the full URL of the web service we used in Postman earlier and paste into the URL box. Don’t make an entry into the ‘Headers’ box
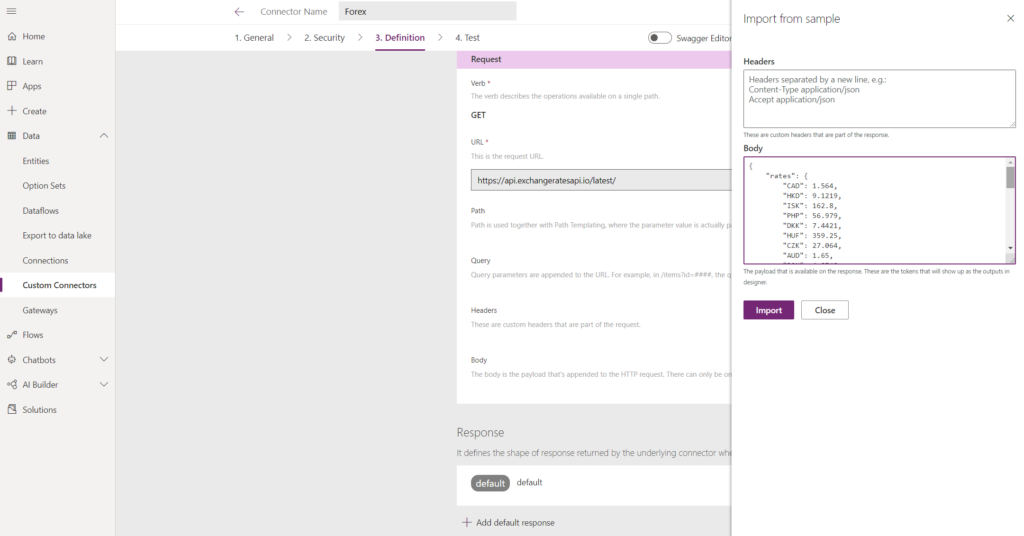
Click ‘Import’. Scroll down to the ‘Response’ section and select ‘Add default response’. Again, leave the ‘Header’ box blank and in the ‘Body’ box paste the JSON response received in Postman earlier showing all the currencies and the individual rates
Select ‘Import’
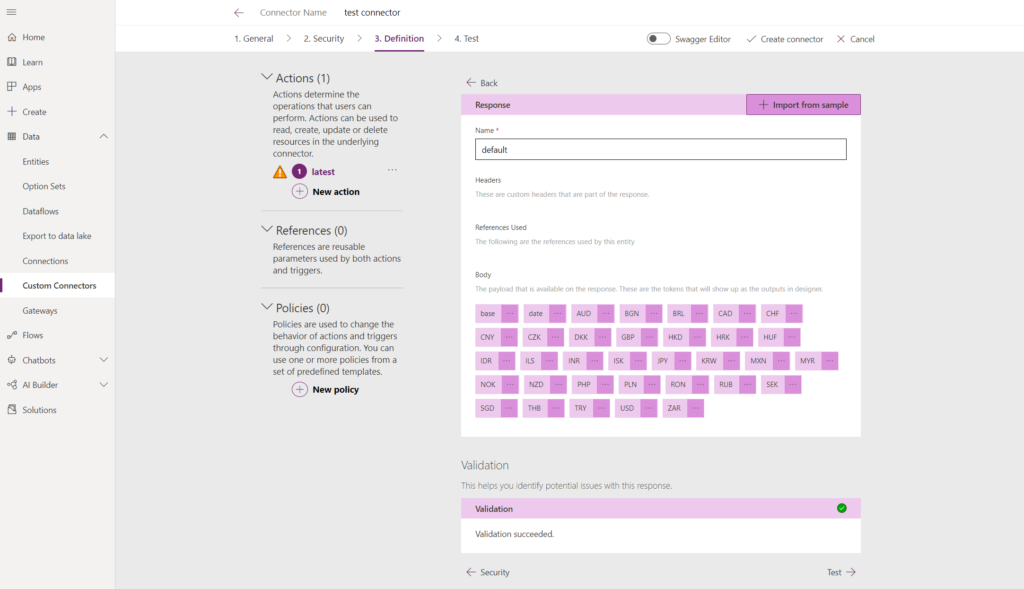
Now click on the Default Response and you’ll get a good idea if all is likely to be working well – you should see the base, date and all the exchange currencies listed and the validation process should show ‘succeeded’, as below
Almost there now. Before testing, go to the top right of the screen and create the Connector
Once successfully created, test the Connector before doing anything else. Confirming everything is working here before moving on, could save lots of time when building your Power App. At the end of the test, you should see a Status 200 code meaning the Get call has been successful, together with the same JSON content you saw returned in Postman
That’s it, your Customer Connector has been created
Displaying the content in Power Apps
Now you’ve created the Custom Connector, displaying the data in Power Apps is the easy part. First of all, create a new App. Using the left hand Data menu, search for your Connector name and add the new Connector
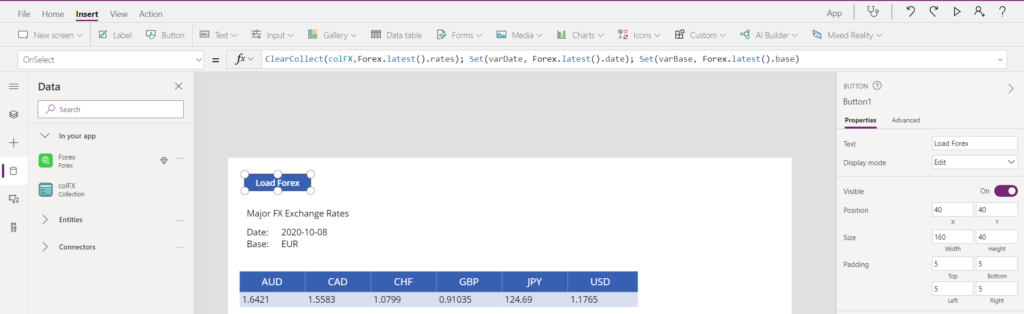
We need a means of loading the data into a collection. For a production App, this could be done when the App is launched or when a screen is loaded. However, when building an App, it’s always better to run this manually first to make sure all works OK, so we’ll insert a button and use this to load the data into a collection and variables
As always Power Apps is great at leading you through the process and avoiding any errors as you write the function to load the exchange rate data into a collection and the date and base values into variables
To access the individual exchange rates simply use the First function as you would with any other collection
First(colFX).AUD
As you can see in the image above, I’ve selected the major currencies from the colFX collection for presention in a simple table
In the next post I’ll look at more complex Customer Connectors