In the previous post: Build a Basic Custom Connector, I showed how to create a Custom Connector to access a simple web service API that didn’t require any authorisation or other information to be passed to it, to return the requested data
Now I’ll look at a more complex service that returns data on a specific product. The site is edamam.com which provides various data on food products and recipies through a number of APIs. We’ll be using the Food and Grocery Database API, of which details are here: https://developer.edamam.com/food-database-api
Custom Connectors requiring an API Key
This API requires the client platform (in our case Power Apps) to provide a product barcode called a UPC (Universal Product Code). The database will then return a product description, nutritional details, a link to an image of the product as well as other information
To access the API and database you’ll need to sign up to Edamam and get a free App ID and App Key
The UPC, App ID and App Key will be appended to the URL and sent to the database by Power Apps and the custom connector
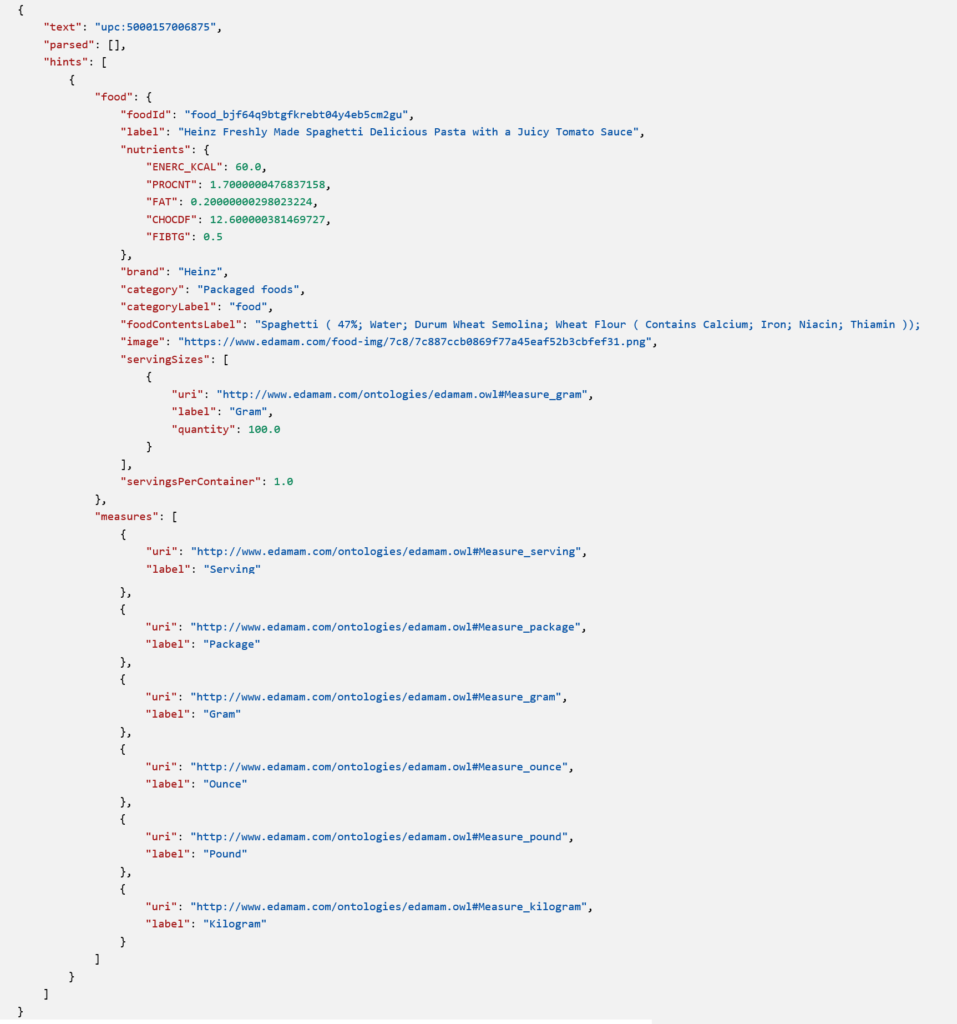
The URL below returns data on UPC code 5000157006875 (Heinz Spaghetti). You can see the App ID and App Key at the end of the URL with the segment of data separated by a ampersand
If the full URL above is entered into Postman (or a web browser), the following JSON file is returned from Edamam. Postman structures the data so it’s easier to interpret, but web browsers do not. For more info on Postman see: How to build a Custom Connector
As with the web service used in the previous post, we can take this data, load it into one or more Power Apps collections and variables and display in an app
Before reading this post any further, If you haven’t already, I’d recommend reading my earlier post Build a Basic Custom Connector as the technique is the same and for the sake of brevity I won’t repeat the more fundamental steps, but focus on the additional actions required to create custom connector for this more complex API
Creating the Customer Connector
OK, lets get started
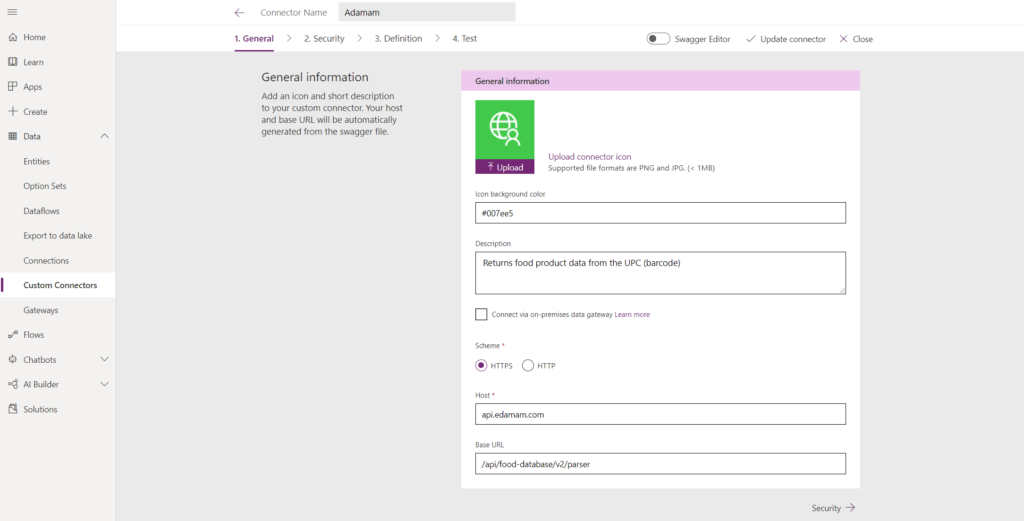
Again we’ll be using the Customer Connector Wizard. Go to make.powerapps.com and select Data / Custom Connectors and then select New custom connector / Create from blank. Give the Connector a name and move to the General screen
Complete as below, nothing significantly different here from the simpler API we created in the previous post
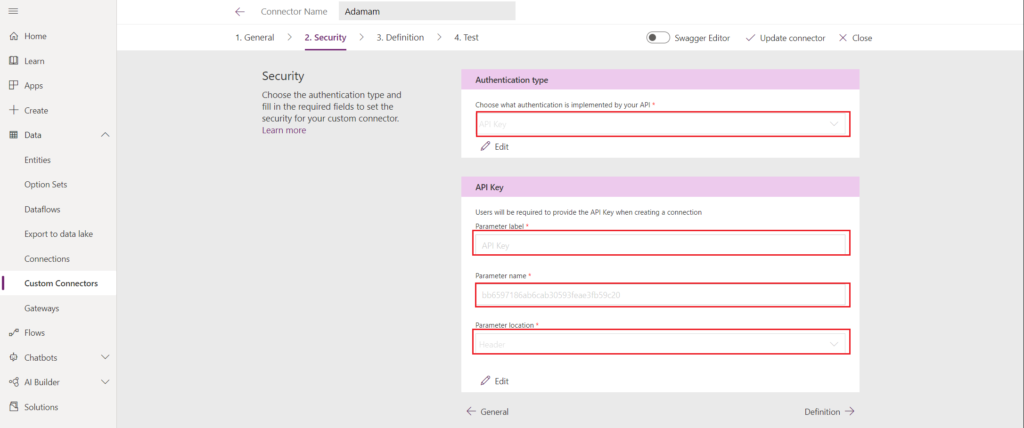
Move to the Security page. As this API requires authorisation, this is where we specify it. The boxes are highlighted below where data is required
Authentication type: “API Key”
Parameter label: “API Key”
Parameter name: your unique API Key
Parameter location: “Header”
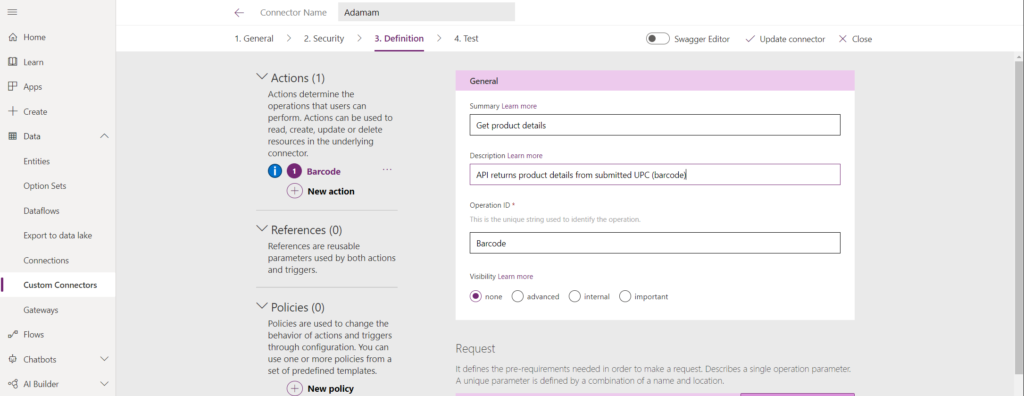
Move on to the Definition page. Add a New Action and add a suitable Summary and Description
Enter Barcode in the Operation ID box. This will require the entering of a barcode in Power Apps before the URL string is submitted
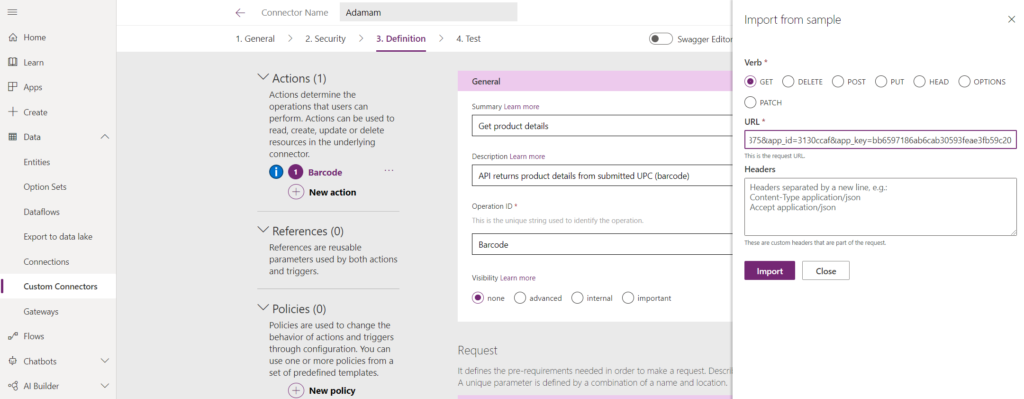
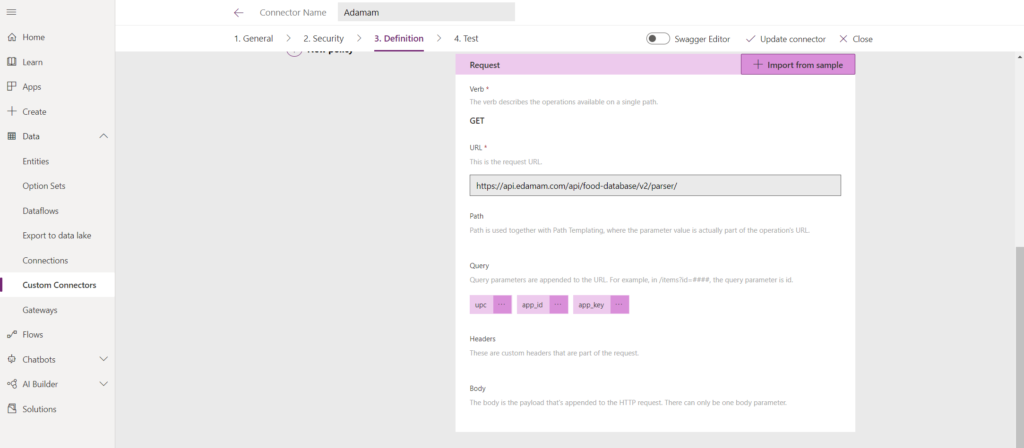
Click Request / Import from sample. Select ‘Get’ and paste in the full URL in the URL box
Leave the header box empty and select ‘Import’
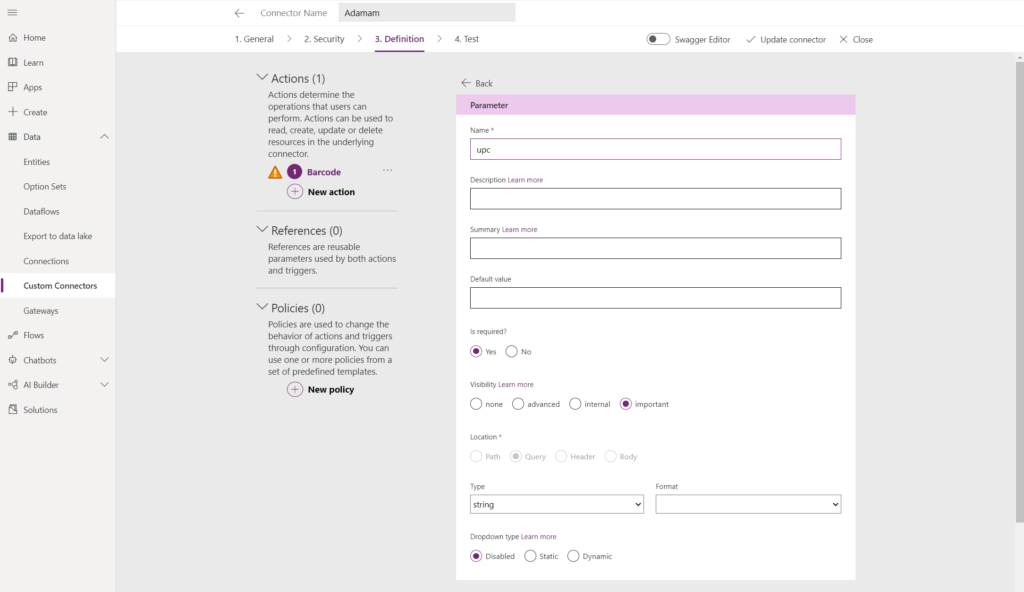
Click on the newly created UPC box and select ‘Edit’. Change the ‘Is required’ Radio button to ‘Yes’. This will ensure that a barcode has to be entered before the request is passed to the API. Change the Visibility radio button to important and make sure the Type is string – as shown below
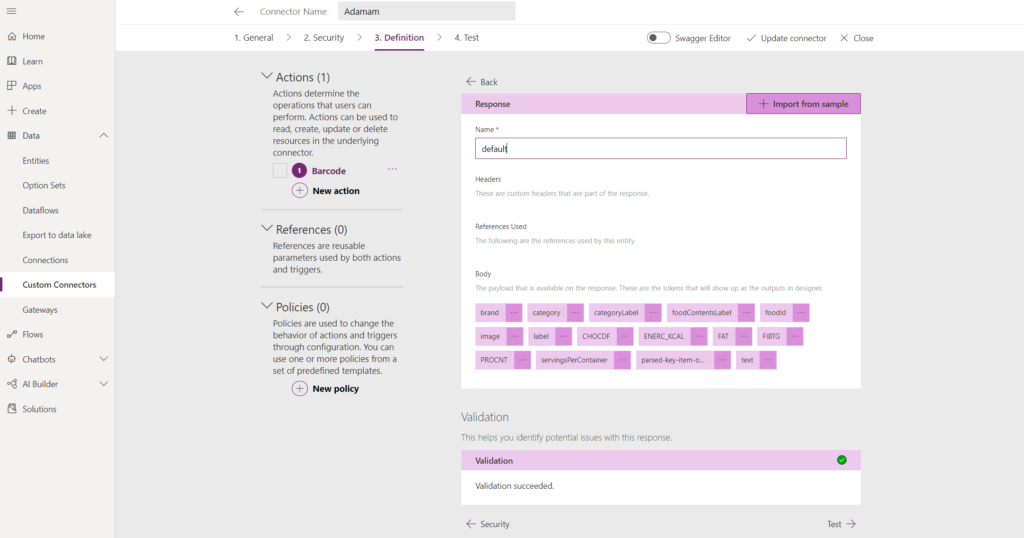
Move on to Response and click on ‘Add default response’. Paste the JSON file into the Body box. Leave the Headers box empty and click ‘Import’
Click on Default and you will now see the list of data the API will be returning. Under the Validation heading, you should also see ‘Validation succeeded’ so now go ahead and create the connector and test it with the barcode: 5000157006875. You will see the JSON you pasted earlier returned by the connector
Thats it, connector created! Now to create an app to get access to the data
Displaying the content in Power Apps
Now the Connector is complete, building the App and displaying the data is straghtforward
Create a new canvas app and connect to the custom connector
The app opposite has a Button to activate the Scanner control. It takes the barcode, makes a call to the custom connector and then loads the returned data in to the colProduct collection. The formula for the OnSelect property of the button is below:
Individual field data is retreived from the colProduct collection by using the First function. Below are the formulas to retrieve the fields and image from the Collection and display them in the App
The Connector has lots of potential, for example to assist those with poor eyesight. The App could be developed further to help those people with allergies or who simply want to quickly and simply findout if their food is vegetarian or vegan