The Table function is used in Power Apps to manually create a Table within a Power App control rather than retrieving data from a networked data source (such as SharePoint) or a Collection. But what is it used for and how useful is it?
Table Function
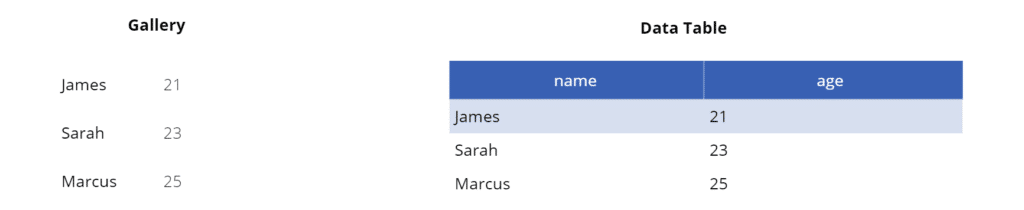
The following formula creates a Table with 2 columns called name and age
Generally within Power Apps, curly braces { } denote a distinct record, so it is easy to recognise that the above Table function creates 3 records
Setting the Items property of a Gallery control to the above formula enables the data to be displayed in the Gallery. However, surprisingly, it’s not possible to view a Table function in a Data Table control
Using Tables in Dropdown, Combo and List Boxes
This formula can also be used as the Items property of Input Boxes such as Dropdowns, Lists and Combo boxes to specify the available options. Only the first column is displayed though and the others are ignored. Because of this, just include the data you want displayed and simplify the formula to a single column Table
In fact, the formula for single column Tables can be further simplified by replacing the explicit Table function with square brackets [ ] that denote a single column Table. The column header can also be removed giving a much simpler function the result of which is a single column Table with the output given the default column name ‘Value‘:
["James","Sarah","Marcus"]
So far so good. However, unlike a Collection, a big limitation of the Table function is that it is not possible to give the Table a name. This means a Table function cannot be referenced from elsewhere in the App and can only exist within the control in which it has been created. This is quite a limitation!
Collections
To give a Table a name (or to be more accurate, to do the equivalent of giving a Table a name), a Collection needs to be created. Going back to the formula for our original Table, a subtle change of code creates a Collection called colStudent with the same 2 columns and 3 records
Again, we can simplify the formula and the explicit Table function can be removed. The formula below works slightly differently to the one above as all of the records are added to the Collection individually, rather than collectively as a Table and then individually extracted, but the result is the same
Because a Collection is always given a name, it can be referenced anywhere in the App from any Screen. This makes it way more useful than a Table! We can now display the contents of the Collection in both a Gallery and a Data Table control by setting their Items property to colStudent
Embedding Tables in Collections
It is also possible to nest (embed) a Table within in a Collection record. The formula below assigns a name (StudentList) to the Table. The individual items within the Table aren’t extracted. Instead the entire Table is added as a record within the Collection
You can also include an additional column to give a description of the Table, which can be helpful
We can display the contents of the Table in a Gallery or Data Table control by making use of the Ungroup function and specifying the following as the Items property:
Ungroup(colStudent,"StudentList")
The individual records and fields within the Table can be accessed using dot-notation. For example, to create a Label that displays the name of the first student in the Table, use the following:
First(Ungroup(colStudent,"StudentList")).name
And to show the description we’ve given to the nested Table in a Label we can again make use of the Ungroup function:
First(StudentList).Title
It’s also possible to nest Tables within other Tables both by using the Table function within a control or assigning nested Tables to a Collection
Why Use the Table Function?
OK, that’s all good stuff, but the all important question is, what are the benefits of using the Table function in Power Apps?
Where it’s a requirement to have the contents of Input boxes such as Dropdowns dynamically generated, the Table function isn’t usually required. Checkout my links below on how best to do this
However, if you need to hardcode the contents of a Dropdown, or a Gallery, the Table function is the way to do this. Here is a great video from Reza Dorrani using the Table function within a Gallery to create the titles for a tabbed form in Power Apps. Just bear in mind that, a Table created by the Table function is only accessible from within the control in which it has been created
It’s also really useful being able to embed a Table inside a Variable or Collection. This way a Table can be given a name and it can be used in other controls. Using the Table function in conjunction with the Group and Ungroup functions can also be a good way to manipulate data. For example nested Tables can be used to create an itemised picklist or invoice breakdown